Custom 7 String bridge
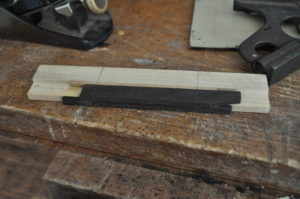
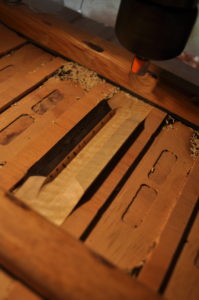
The first stage of making one of my signature classical bridges is laminating the blank, with ebony capping for the tie block. I prefer to use ebony capping rather than bone due to its comparable hardness, and also that bonding wood to wood provides a better structural integrity than bone to wood. My bridges have a fairly streamline and slim design to minimise mass and reduce stress risers; so I use what I feel is the optimum choice of materials, including the choice of Australian Silver Ash over traditional timbers like Rosewood for the body of the bridge. Silver ash is a tough, medium to heavy weighted timber. Importantly it has a very straight and predictable grain, which becomes crucial with smaller profiles. Accordingly, great pains are taken in the cutting of the blank out of the original piece of timber to ensure that the grain runs quartered, and parallel to the surface. Grain orientation is also crucial in tops, for similar reasons. Having said that, this particular blank has a tiny amount of waviness in the grain which is just enough to give it a lovely flamed appearance, evident by the subtle stripes. When finished this should come up nicely. Here you can also just see the drilling of the 7 string holes. In this case the client has specified double drillings for the first three solid “Carbon” (teflon) E, B and G strings. These are the slipperiest of all strings and are prone to slapping the top, and the extra holes give a few more choices on windings and wraps.
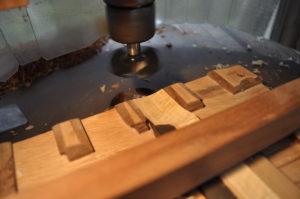
This next step (above) shows my trusty overhead router with one of my larger bits. This is a shallow curve I use to shape the wings of the bridge. Held securely in one of two purpose made bridge jigs, machining is straight forward, albeit a little intense due to the possibility of making errors. The tolerances for machining bridges is up to 0.2mm and set by eye and hand. The worst thing that can happen during machining is the bit grabbing the piece, and dragging it through the cutter path.
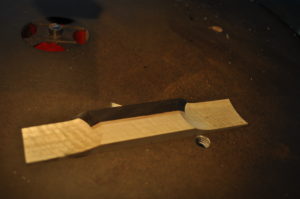
The second of my jigs and bits are shown here, and are used to cut a rounded-edged channel through the centre of the bridge. This reveals the drillings, and allows access for tying of strings. Another bit also faces a slight concave surface into the top ebony capping on the tie block. This facilitates winding of strings when tying, and also provides for a little extra ebony on the edges for wear and tear.
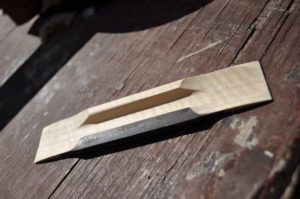
Here the bridge is nearing completion of the shaping phase. There is a fair bit of work still to do with some shaping of the tie block, routing of the saddle slot, finishingand staining, and finally fitting. That will come later….
You must be logged in to post a comment.
